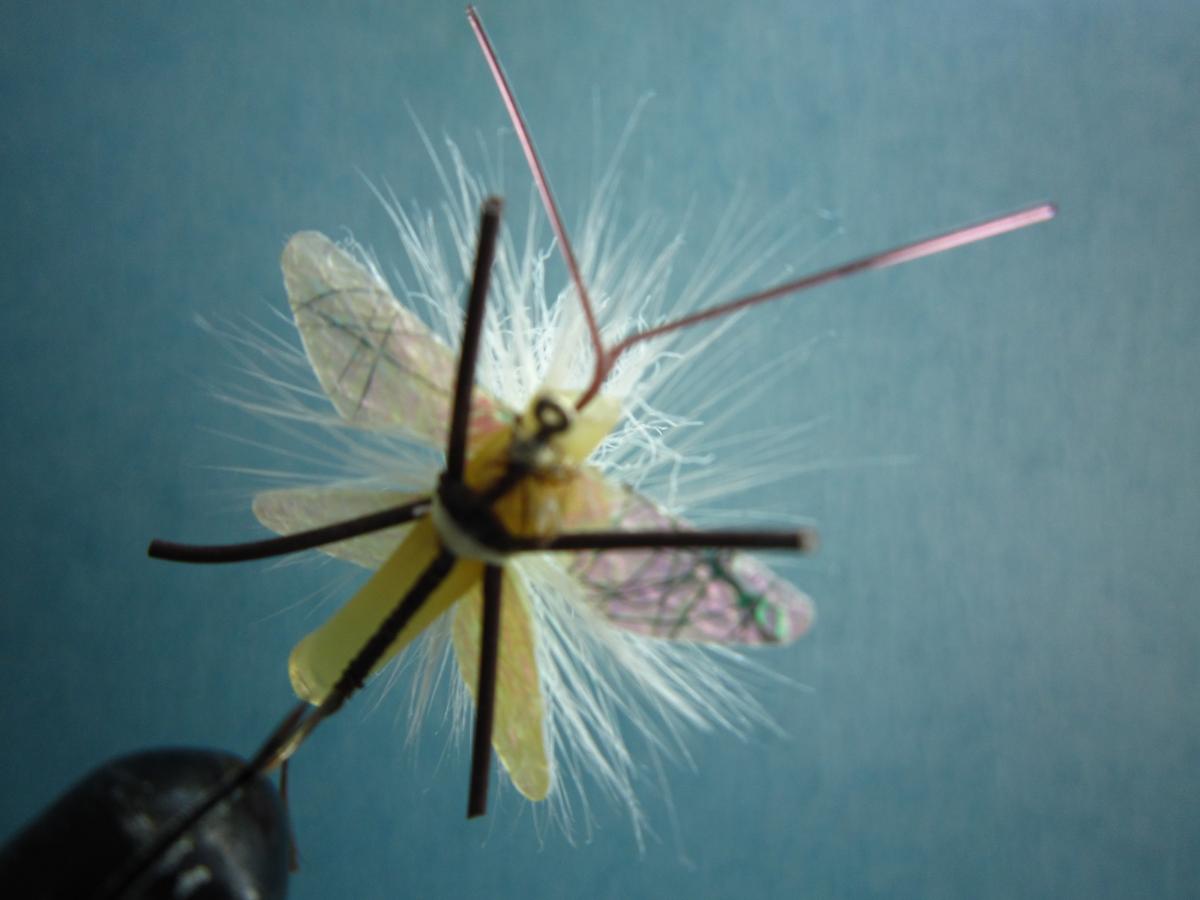
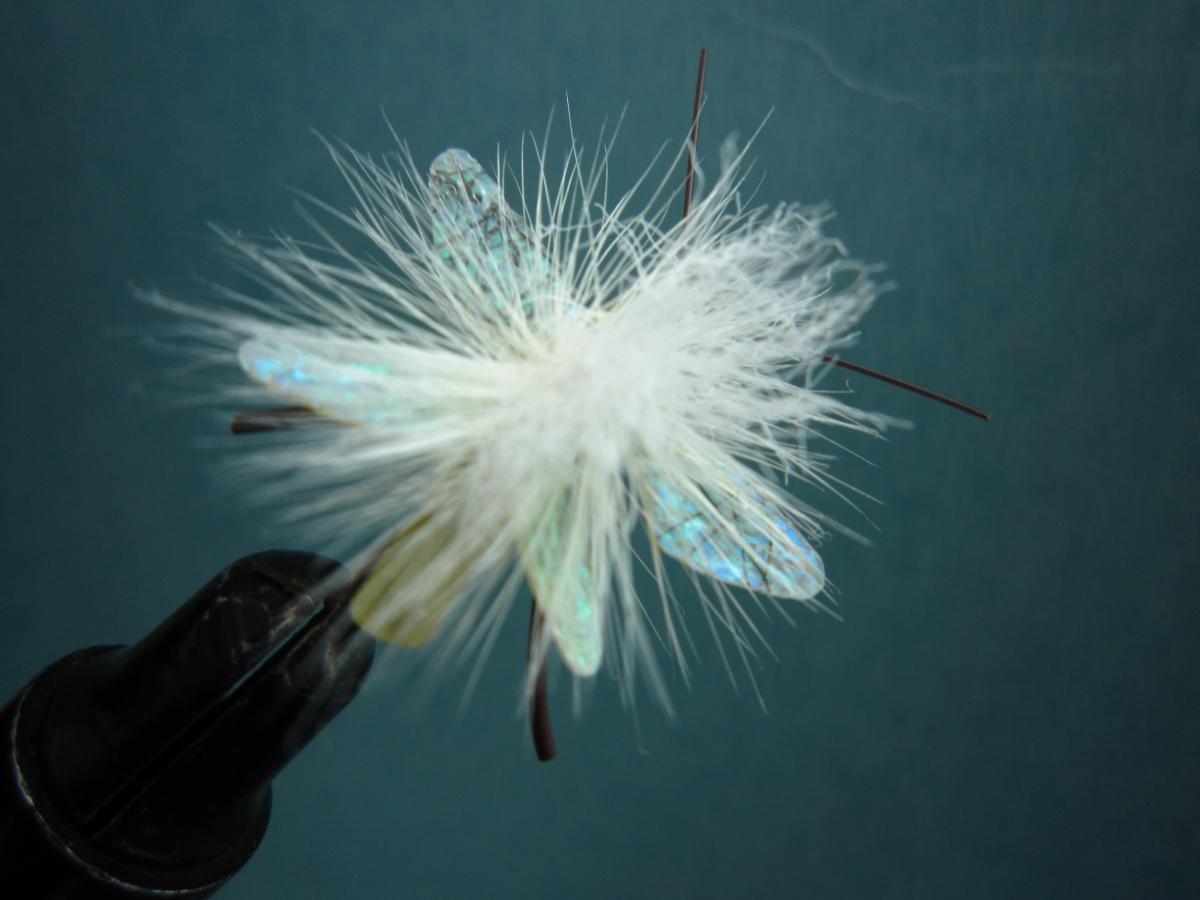
This blog will take off where the book "Unsinkable Dry Flies" left off, listing new and different ways to tie flies by attaching a air bubble to the hook. The flies displayed may be imitations of flies found in other reference materials or something completely unique. If you have a new idea email us, we will endeavor to post it on the Blog with your credit.

Saturday, January 23, 2021

Dave's Montana Wonder Bug


This pattern works extremely well and was developed as an alternative to the purple haze. When I first tied it I wondered if it would work, when it did I wondered why -- Thus Dave's Montana Wonder Bug.
Recipe Montana Wonder Bug

Hook: Any brand 4X long size 6 to 16 with a fine wire, having as wide a gape
as possible. (aberdeen hook)
Thread: Purple 6/0 (70 denier) or larger (Metallic Thread if available)
Body: Purple Heat Shrink 1/8 or 3/16 diameter colored with alcohol ink: Note
other sizes can be used with smaller hooks. Tan Foam. Don't like heat shrink use purple foam. 
Legs: Medium to fine speckled white rubber centipede leg material
Post: White Polypropylene Yarn
Wing: Saddle white dun and (Optional) white web wing or similar

Egg Sack: (Optional) Black Foam
Tail: (Optional) White Goose Biots

1. Cut a single or two twin sections of Heat Shrink as long as the hook shank plus at least a 1/8 inch. Note: Twin sections are used when using smaller Heat Shrink.

2. Cut a section of tan foam approximately the same width as the Heat Shrink.
3. Cover the hook shank with thread.
4. Attach the heat shrink at the rear of the hook one section at a time using at least three thread wraps. Use heat to pinch the heat shrink to the hook shank.
5. Attach the foam at the rear of the hook shank and work the thread up to the eye.
6. Attach the heat shrink and foam at the eye using at least three  thread wraps. Use heat to pinch the heat shrink to the   hook shank and finish forming the air bubble.
7. Seal the thread at the hook eye with head cement or super  glue. Trim off any excess foam and heat shrink.  
8.  Attach the centipede legs in a crossing pattern between the with tread when attaching the foam and heat shrink.the foam and hook shank.  Note: legs can added at the rear  and eye anchor point.

9. Cement the legs in place with super glue if you use the crossing pattern. 

10. Add the Heat  Shrink, optional white web wing or similar, and PP post taking 6-8 wraps around the post with light blue dun or white saddle parachute style. Seal the thread at the hook eye with super glue. 
11. Tails (white biots) and black foam egg sack can be added but do not seem to improve the patterns performance.

Monday, February 24, 2020

Soft Hackle Dry Fly

Here is a different twist on an old favorite the Soft Hackle Dry Fly.  This fly uses clear 1/8 inch polyolefin heat shrink to add an air bubble to the fly shank thus improving the buoyancy to some degree.


Hook Size 8 thu 16 1x Fine 3-4x Long

  1.  Wrap the hook shank with thread - In this case metallic blue
  2.  Tie in the tail material
  3.  Cut off the excess
  4.  Slip on the 1/8 inch polyolefin heat shrink
  5.  Position on the shank
  6.  Shrink the rear portion of the heat shrink approximately half way up the shank using a 15 watt soldering iron
  7.  Wrap the shrunk portion of the heat shrink with the thread
  8.  Whip finish and cut and seal with head cement or super glue
  9.  Shrink the heat shrink just behind the hook eye
  10.  Wrap the head with the thread
  11.  Tie in a hackle feather
  12.  Wrap and tie off the feather trimming excess seal with head cement or super glue

Tuesday, February 11, 2020

Aero Fly

Aero Fly a Perfect Spinner Fly

As we all know spinners or spent flies attract numerous trout to the surface.  That’s why some of us are always looking for a spinner that will present a profile on the water unlike traditional spinner flies but just unique enough to make it stand out from the crowd.  With this in mind I stared to experiment using different wing designs and body materials.  What I ended up with is what I called the Aero Fly.

The Aero Fly does not have a traditional body and the wings form a fighter jet type of appearance thus the name.  The body is 1/8 inch natural latex tubing although one can use a cream colored dubbing to achieve the same appearance.  I used latex tubing for the color, the specific gravity of .94 to .95 and the fact that air can be trapped inside to ad to the buoyancy.  It also has the advantage of not impeding the hook gap that a wrapped dubbing can sometimes do. 
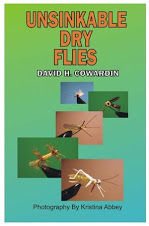
Aero Fly 1.JPG Aero Fly 2.JPG

It is actually a fairly simple fly.  The steps are as follows:

Hook – Size 8 to 16, 3 or 4x long with a light wire wrapped with Brown 6/0 thread
Legs – Brown rubber tied in on sides of the 1/3 down hook shank behind the eye
Antenna – Brown mono inserted in the 1/8 inch natural latex tubing (Max 10#)
Body – Natural latex shank length tied in tightly compressing it at leg tie in point
Wing – Iridescent web wing type material tied in at the same point
Wing Post – White Polypropylene
Wing Finish – White Saddle feather tied parachute style 5 to 8 wraps
Tail  -  Optional (Not Shown) two mono fibers

Finish with a drop of head cement or super glue at the eye and on the end of the latex tubing (if used) to seal in the air.  This fly also works well by its self as a good imitator of a PMD

Thursday, February 6, 2020

Yellow Sally - Golden Stone


The materials are as follows:

Hook – size 16 – 12 any brand 4-6x long with as light of wire as possible (Yellow Sally)
            size 8 – 14 (Golden Stone)
Thread - yellow and metallic orange
Body – 1/8 inch natural latex tubing
Wing – clear web wing material with black netting (see how to make at                                  https://unsinkableflies.blogspot.com/2012/02/making-fly-wing-material-fly-tying.html)
Antenna & Tail – brown monofilament
Legs - brown rubber
Collar - grizzly saddle


Directions:

  1. Wrap the hook shank with yellow thread.
  2. Form the tails and antenna by tying in one section of 15# brown monofilament to one side of hook shank
  3. Repeat step two on the other side of the hook shank leaving the thread at the rear of the shank
  4. Slide the 1/8 inch latex over the mono antenna and hook shank
  5. Tie in the latex at the rear of the hook shank with the thread
  6. Work the thread approximately 1/3 up the shank and tie in the rear legs
  7. To the front of the rear legs use the orange metallic thread to form the egg sack (Optional Golden Stone)
  8. Tie in front legs to one side of the hook shank
  9. Tie in the other legs to the opposite side of the hook shank
  10. Tie in the wing just behind the hook eye
  11. Tie in the saddle feather
  12. Wrap the saddle feather 3 to 5 times and tie off
  13. Side view finished fly – Note you may need to trim the legs, antenna, and tails
  14. Top view finished fly

Thursday, January 23, 2020

Double Dipper Strike Indicator Fly


The Double Dipper Strike Indicator Fly is a large highly visible and very buoyant fly.  Because it is so buoyant one can run one or two smaller dropper flies off it at one time.  I call it a Double Dipper because it has two of each type of material except for legs in which it has four sets of two, two on each side of the body. 


-        Hook 6x long any brand with a light of wire as possible
-        Body one 2 to 1-1/2 inch of 3/16 heat shrink and 2 sections of foam of the same length.
-        Thread metallic purple
-        Legs black and white speckled rubber
-        Post white polypropylene
-        Wings white or luminess web wing or similar and white saddle feather 

The heat shrink needs to be colored purple and is divided into two bubbles.  The foam can be a variety of colors although I prefer black and beige.

Sunday, January 19, 2020

Crane Fly


The Crane Fly is a fly that is not found on all rivers, but when it is present it is a great fly to fish.  Crane flies seem to like smaller tail waters one of the best of these in Montana is the Beaverhead River.  The Beaverhead River is produces more large brown trout (16-18” very common) than any other river in Montana and a Crane Fly is a great way to catch them. 

Usually prime dry fly fishing of the Crane Fly starts around mid July and can last well into October. Windy days often produce the best results as Crane Flies are not very aerodynamic and fall off of foliage near the water is numbers that soon catch the attention of fish.  


Recipe – Crane Fly

-  Hook – 4 or 6X Long Shank, Size 14 – 10 light of wire as possible
-  Thread – 6/0 Light Brown or Carmel
-  Body – 2 inches of1/8 inch Heat Shrink Tubing Colored Brown or Carmel
-  Wing – Saddle Hackle Dark Barred Ginger – Sometimes called Grizzly
-  Legs – Hairline Crazy Legs Gold or Similar

Fish this fly calmer water especially under overhanging bushes and trees.

Crane Fly Nymphs or Larvae


Crane Fly nymphs or larvae can be fished when water temperatures begin to rise in late winter and early spring.  The water temperature should be approaching 40 degrees so the fish are becoming more active. 

Recipe Crane Fly Nymph

- Hook – Curved Nymph Hook Any Brand 4-10
- Weight – Lead Free Wire
- Body - Latex Tubing 1/8 to 3/16 Inch Colored Green
- Thread – 6.0 Black
- Rib – Copper Wire
- Head – Black Foam

Fish this nymph in less than fast moving water with a light to heavy gravel bottom and some moss.  The best technique I have found is to bounce it along the bottom.

Monday, November 18, 2019

Seeya Fly


This fly was inspired by an article in autumn 2019 Fly Tyer Magazine titled “What Trout See” and was named by my wife Jennifer.  The fly uses the three most visible colors as outlined in the article orange, yellow, and white.  Not sure yet how it fishes more on that next season.

Hook:            Size 12 – 6X Long light as wire as possible any brand
Thread:         Orange Sulky Metallic
Body:            Orange Heat Shrink partly covered with Yellow sheet foam
Tail:               White goose biots
Legs:             Black and white rubber
Post:              White poly
Wing:             White web wing or similar with a white saddle hackle


Thursday, November 8, 2018

Skwala Fly

Unsinkable Skwala


1.  Hook size 8-12 - 4x long light wire - wrap shank with 6/0 olive thread
  2.  Tie in black foam for egg sack
  3.  Slide heat shrink(HS) tubing colored green with ink over shank
  4.  Insert brown mono in tubing for antana and tails
  5.  Use iron to shrink tubing at rear
  6.  Tie in HS and work thread up shank over HS lightly about 1/3 lenght of shank
  7.  Tie in gray ruber leg on one side then the other
  8.  Pinch two legs holding them to HS and work thread about 2/3 lenght of shank
  9.  Tie in legs tightly compresses HS
10.   Work thread up to head, use iron to shrink HS at head 
11.   Tie in 3 wings*  
12.  Tie in gray foam to form head
13.  Tie in front legs
14.  Tie in yellow foam to help visibility
15.  Straighten/trim tails and anatana with iron - seal with head cement


Skwala Facts and Rules


Skwala's are interesting flies for several reasons.  First of all, they are the first substantial dry fly of the year not only in size 1 to 1-1/4 inch in size but quantity.  Because of this fish, often big, that are hungry from a long winter make for good dry fly fishing opportunities.  In addition, streams and rivers have fairly low flows with the ideal water temperature being 45 to 48F degrees although you may see them in water as cold as 40 to 42F depending on the amount of sun and radiational heating from the previous day.  

The flies crawl out on the bank in the morning, mate, and the females return to the water in the afternoon to lay eggs.  The females return to the water often swimming rather than flying and are generally found in slower speed pools on the edges in water that is only at the most two feet deep and no more than 3-5 feet from shore.  

Skwala Fishing Rules


1.  Fish in the afternoon - water temp of at least 42F (45-48F ideal)
2.  Fish slow speed water - no faster than you can walk
3.  Watch for dry flies on the water or ground - if none nymph
4.  Hatches are often small - watch for rising fish
5.  Run a dropper below your dry fly
6.  Use delicate presentations - no hard splashes
7.  Look for slow, clean, and quite drifts or twitch your fly in surface film or foam 
  8.  Use a dry fly that floats well and is not prone to sinking

Friday, February 23, 2018

Salmon Fly

The Dream Salmon Fly

I’m going to show you how to tie a Salmon Fly that will out perform all others simply because it presents right profile and size.  Stop here if you are not into different materials because this fly is definitely non-traditional and the main body is not tied but assembled.   This fly floats like a cork and is impossible to sink always popping to the surface even in the roughest of water.

The ideal fly is 2 ½ to 3 inches long (6-8 Centimeters)


The materials are as follows:

Hook – size 2-6 any brand 4-6x long with as light of wire as possible
Thread - brown and metallic orange
Body – ¼ inch colored or UV reactive orange heat shrink or orange latex tubing
Head – ¼ inch gray polyethylene closed cell foam
Wing - home made wing material with black netting and some type of sparkle (follow this link to see how to make https://unsinkableflies.blogspot.com/2012/02/making-fly-wing-material-fly-tying.html)
Antenna – brown monofilament
Legs - brown rubber
Eyes - black mono or vinyl
Egg Sack – ¼ inch round black foam
Collar - brown saddle (optional)


Shown in the pictures above are the materials to be used and a 15 watt soldering iron used to segment the heat shrink fly body.  Note the two body materials the top one is orange UV Heat Shrink and the one below the top one is the colored heat shrink.  

  
The heat shrink bodies above have been segmented and assembled prior to attachment to the hook.  If the body is latex segmenting is performed by pulling the thread tightly around the hook shank.  The egg sack and head is super glued into place along with shrinking with the soldering iron.  The eyes shown are super glued into place..

  
Directions:

  1. Wrap the hook shank with brown thread.
  2. At the rear of the hook tie in the assembled fly body (6-10 wraps).
  3. Tie in the rear legs (location of legs varies depending on amount of segments).
  4. Work you way up the hook shank applying 6-10 wraps at each segment and tie in the middle legs.
  5. Near the eye tie in the tie in the front legs.
  6. Whip finish at the eye with the brown thread.
  7. Tie in the metallic orange thread at the first or second front segment.
  8. Attach the wing or wings (1 to 3 depending on the fly).
  9. Whip finish with the metallic orange thread and apply a small amount of head cement or super glue long the hook shank.  This will stabilize the body and keep it from rotating on the hook shank.
  10. Under side of finished fly. 


 The top three flies above do not have the optional brown saddle collar.  The reason most salmon fly tiers add a collar or fur as wing is to provide flotation.  This is not necessary on a salmon fly like this because of the air trapped inside the fly body. On the underside one can cut the bottom off the optional brown saddle to provide a better profile on the water. 


Wednesday, January 3, 2018

SW Montana Hatch Calendar

This Hatch Calendar is provided for those of you planning to visit SW Montana in particular Beaverhead County and parts of Madison County.   The rivers included are the Beaverhead, Big Hole, Jefferson, Ruby, and Wise.  While not all rivers and tributaries contain these hatches many do, local fly shops can provide additional information.


Sunday, December 24, 2017

Mating Damsel Fly

Recipe Rated-X Damsel Fly
 Front Fly
-  Hook – 4 or 6X Long Shank, Size 10
-  Thread – 6/0 Blue
-  Eyes 1/8 inch black round foam
-  Body – 1/8 inch Blue Heat Shrink Tubing
-  Collar – Grizzly Hackle (optional)
-  Wing – Web Wing or similar (Clear with black ribbing)
-  Legs – Black and White Rubber or Brown Mono
Rear Fly
           -  On the same hook
-  Thread – 6/0 Blue
-  Eyes 1/8 inch black round foam
-  Body – 3/32 inch Clear Heat Shrink Tubing colored with blue alcohol ink
-  Collar – Grizzly Hackle (optional) 
-  Wing – Web Wing or similar (Clear with black ribbing)
-  Legs – Black and White Rubber or Brown Mono

This fly is great on any water where damsel flies are present.    Fish this fly in calmer water especially under overhanging bushes and trees.

Mating Crane Fly

Recipe – X-Rated Crane Fly


Base Fly
-  Hook – 4 or 6X Long Shank, Size 10
-  Thread – 6/0 Light Brown
-  Body – 1/8 inch Heat Shrink Tubing Colored Brown
-  Wing – Web Wing or similar (Clear with black ribbing)
-  Legs – Brown Monofilament
Butt Fly
           -  No hook
-  Thread – 6/0 Light Brown
-  Body – 3/32 inch Heat Shrink Tubing Colored Brown
-  Wing – Web Wing or similar (Clear with black ribbing)
-  Legs – Brown Monofilament


This fly is great on any water where crane flies are present. (Note: a second hook can be added to the butt fly and connected to the base fly with minimum 20# line)   Fish tend to hit this fly hard especially in calmer water under overhanging bushes and trees.

Wednesday, December 20, 2017

Mating Salmon Fly

Recipe – Big Bang Coitus Fly
Base Fly
             -  Hook – Aberdeen Hook, Size 2
-  Antenna – Brown Monofilament
-  Thread – 6/0 Orange
-  Body – 1/4 inch HeatShrinkz - UV Reactive Orange Heat shrink
-  Wing – Web Wing or similar (Clear with black ribbing)
-  Legs – Brown Rubber
-  Collar – Orange Metallic Thread
-  Head – Gray Foam
 Rear Fly
           -  No hook
-  Antenna – Brown Monofilament
-  Thread – 6/0 Orange
-  Body – 1/4 inch HeatShrinkz - UV Reactive Orange Heat shrink
-  Wing – Web Wing or similar (Clear with black ribbing)
-  Legs – Brown Rubber
-  Collar – Orange Metallic Thread
-  Tail - Black 1/8 inch Foam
-  Head – Brown 1/8 inch Foam

We all know about famous Salmon Fly hatches and have most likely seen Salmon Flies mating on bushes near the waters edge.  What we don’t realize is that fish really key on mating flies when they fall in the water.  Big fish seem to watch for this phenomenon and explode when they see it happening, thus the Big Bang Coitus fly.  Fish this fly anywhere when Salmon flies are out, but especially under overhanging bushes and trees.

Tuesday, December 19, 2017

Mating Stonefly

Recipe Coitus Stonefly
Base Fly
-  Hook – 6X Long Shank, Size 12
-  Antenna – Brown Monofilament
-  Thread – 6/0 Yellow or Gold
-  Tail - Yellow Biot
-  Body – 1/8 inch Latex Tubing
-  Wing – Web Wing or similar (Clear with black ribbing)
-  Legs – Brown Rubber
 Top fly
          -  No hook
-  Thread – 6/0 Yellow or Gold
-  Body – 3/32 inch Clear Heat Shrink Tubing (colored yellow)
-  Wing – Web Wing or similar (Clear with black ribbing)
-  Legs – Brown Rubber
-  Antenna – Brown Monofilament

The development of this fly was suggested to me by a local fly tier and shop owner Tim Tollett after seeing my DC Shuckster.    Fish this fly anywhere when stone flies are out, but especially under overhanging bushes and trees as well as cut banks.

Wednesday, December 13, 2017

Emerger with Shuck

Recipe – DC Shuckster
Shuck
  • Hook – Long shank, light wire, size 8 to 14
  • Thread – 6/0 caramel or light brown
  • Tail - Brown Biot
  • Body – Brown heat shrink
  • Collar – Brown/Green Web Wing of similar
  • Legs – Brown rubber

 Emerger
  • No hook
  • Thread - Green or color to match the emerging fly 
  • Wing – Web Wing or similar (white or off-white)
  • Collar – Grizzly or white saddle feather
  • Legs – White/Black spotted rubber

Taking Gary LaFontaine’s claim of an air bubble causing a nymph to rise to the surface and emerge I have gone one step farther and developed the DC Shuckster.  This nymph/emerger semidry pattern as it is designed to float has both the nymph shuck and the emerging fly with air inside both to hold it right at the surface.  Fish this fly anywhere you would any other emerger, but especially in surface film or foam. 

Monday, December 11, 2017

Dave's Bubble Emerger

Recipe – Dave’s Bubble Emerger


Hook – Long shank, light wire, size 12 to 18
Shuck – Variegated Z-lon or Antron (colors of your choice)
Thread – 6/0 green, yellow, or light brown
Body – Thread
Air Bubble – Clear heat shrink
Wing – Web Wing or similar (white or off-white)
Collar – Grizzly saddle feather cut flat on the bottom
Legs – Brown rubber

Real air bubble nymphs using heat shrink - what I have termed the Dave’s Bubble Emerger.  I realize there is plenty of controversy over Gary LaFontaine’s claim of an air bubble causing a nymph to rise to the surface and emerge, but few dismiss the use of a bead or some type of material (usually Antron) to create this elusion.  So, if you are going to tie a nymph or emerger that has this elusion why not make it a fly that really has an air bubble.  (Note: this technique can be applied to any fly where air bubble elusion is desired)  Fish this fly anywhere you would any other emerger, but especially in surface film or foam.