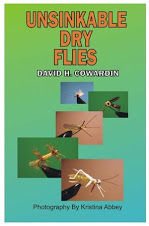
This blog will take off where the book "Unsinkable Dry Flies" left off, listing new and different ways to tie flies by attaching a air bubble to the hook. The flies displayed may be imitations of flies found in other reference materials or something completely unique. If you have a new idea email us, we will endeavor to post it on the Blog with your credit.

Sunday, February 19, 2012

Making Fly Wing Material - Fly Tying

Making wing material that floats is a fairly simple process. To start you need the following items:
1. A pressing table
2. Iron (Hobby or regular pressing iron)
3. Scissors
4. Heat-n-Bond
5. Netting or Polypropylene (PP) Hair
6. Polyethylene foam sheeting
7. Alcohol ink for additional coloring
8. Teflon Pressing Pad

The next step in the process is to determine the color of the wing material to be produced. The wing material can be colored with alcohol ink or just the use colored netting or hair. If ink is to be used it is best to apply it to polyethylene foam sheeting or in some cases directly to the Heat-n-bond material. If ink is used color the entire sheet of material to be used.


After coloring whatever material you are using cut a sheet of Heat-n-bond twice the size of the wing material to be made and lay it out with the colored sheet on top. Then add the netting or PP hair. In this sample the colored sheet is red and black netting is laying on the bottom half with PP black hair on the top half laid out in a random pattern. The Heat-n-Bond is now ready for folding after application of a second colored polyethylene sheet.

With the second sheet applied fold the Heat-n-Bond over to form a sandwich. The two sheets of foam, netting, and hair are all inside the folded Heat-n-Bond. The iron has been set on the hottest setting and the sandwich placed on a Teflon pressing pad to avoid sticking of the over lapping edges of the Heat-n-Bond.


Using the iron press the Heat-n-Bond from the fold to the outer edge until one side is completely flattened. Then turn the sandwich over and press the other side making sure that all edges on both sides are covered. Set the pressed sandwich aside and let it cool completely.


After the sandwich has cooled completely peal back one side of the Heat-n-Bond. Then peal the other side from the fold to remove the backing from the now completed wing material.


The finished material will look like these other examples we have made. If you do not use the polyethylene sheeting, as we did above, you should add another sandwich layer of Heat-n-bond to provide sufficient strength and prevent the wing material from tearing. It should be noted that you can also add glitter, flash, tinsel, or other attractor materials to make the finished wings more luminous.


Thursday, February 16, 2012

7 Killer Unsinkable Dry Flies

Red Eye PMD - Skwala - Stonefly


Mige Size 18 - Linneweh - Golden Stone


Black Caddis


These patterns are very effective


Friday, December 9, 2011

Rubber Tubing

Natural Latex Rubber Tubing is another material that can be used to tie "Unsinkable Dry Flies." The material comes in sizes with an inside diameter of 1/16" to 1" with the most useful sizes being 1/16", 1/32", 1/8", and 3/32." The best wall thickness is 1/16" to 1/32." The tubing has specific gravity of less than one and will float even without an air bubble trapped inside. Colored tubing is available but is expensive compared to the natural color shown here. The tubing can be colored with permanent marking pens or inside with the use of alcohol based ink. It also works extremely well to tie nymphs. An example is shown to the left -- simply wrap the hook shank with lead and slide the tubing over the wrapped shank -- Then add skin, legs, antenna, etc.


Wednesday, March 16, 2011

Polypropylene Hair


Polypropylene (PP) Hair available on the Internet can be a great substitute for fur or other forms of hair. The advantage is that it has a specific gravity of less than 1, .91 to be exact which means it floats. It usually is called super jumbo braid and a large quantity can be purchased for under $2.00 plus shipping. It comes it a variety of colors and blends. The hair should be identified as Polypropylene or PP if not contact the supplier before purchasing. One supplier to avoid is ragdollhair, who may also be listed as ragdolly.net, their service is extremely poor.

Thursday, December 9, 2010

Ideas for Coloring Tubing

This first idea was submitted by Matthew Timbs (12-1-2010)


I've got an idea for you. Would it be possible to use clear heat shrink tubing, and (using a hooked needle or something) pull colored dubbing through the tube before shrinking it? Would that be a way to add color? It'd still float because of the air trapped within the dubbing, and you could get really creative with the colors.


This is a good idea Matt -- Thanks for the suggestion


Something else tiers may want to experiment with is using dye or ink inside of clear heat shrink tubing. We have been playing with this for some time using alcohol ink from Adirondac with some excellent results (See Picture Below). To accomplish coloring the inside use small bottles of Adirondac ink and place the tube over the bottle spout and suck the ink inside by using the tubing like a straw. After coloring set the tubing aside and let it dry.


There are several advantages to the dye or ink method of coloring; One is cost, it is more cost effective to purchase one large roll of clear vs. several feet of a colored heat shrink; two, clear polyolefin heat shrink is lighter than most colored tubing -- clear has a specific gravity of less than one, usually around .91-.93, meaning it floats even without trapped air inside -- while most colored polyolefin heat shrink will sink because its specific gravity is more than one, up to 1.5 in some cases; and three, colors are generally more vivid and do not come off as some coloring will on the outside of the tubing over time or use.

Sunday, January 17, 2010

Recipe the Unsinkable Drake Mayfly


Hook: Any brand size 12 thru 20 with a fine wire, having a widest gap as possible
Thread: To match the insect color usually brown, green, gray, or white
Body: Heat Shrink 3/64 or 1/16 diameter to match insect color (Note: clear heat shrink can be used and colored with a permanent marker)
Tail: 8 to 6 pound monofilament to match insect color or clear colored with a permanent marker
Wing: Web Wing or equivalent
Hackle: To match insect color

1. Cut a section of clear 3/64 inch Heat Shrink approximately ¾ of an inch long.
2. Using a soldering iron (15 watt or less) shrink the end and form at least 3 to a maximum 6 dimples in the Heat Shrink body.
3. Insert the both ends of a loop of monofilament
approximately 3 inches long into the Heat Shrink body.
4. Seal the loop of monofilament in the end of the Heat Shrink with a drop of super glue (use Zip Kicker to set the super glue quickly).
5. Place the hook in the vice and wrap the thread from the eye to just before the bend.
6. Attach the Heat Shrink just above the hook bend at the 3rd indentation from the tail end. Use at least 6 wraps.
7. Repeat this process at the any other indentation working toward the hook eye or just behind the hook eye.
8. Attach the wings at the 1st indentation or just behind the hook eye. Heat Shrink If necessary, use a small drop of head cement or super glue to hold the wing in place.

9. Add the appropriate color hackle.
10. Tie off the thread at the hook eye and seal with head cement.
11. Trim the tail to the appropriate size.

Tuesday, January 12, 2010

B and B Trading

We just found a new supplier of Heat Shrink B and B Trading. Their prices are under most other suppliers and the shipping rates are the best we have found. They only have a limited range of colors including clear, but most tyers will find them to be sufficient. We have added a link to their web site under suppliers.